Most people don’t realize that a little water dripping from an air conditioner isn’t a malfunction — it’s physics doing exactly what it’s supposed to do. The same process that makes a cold glass of lemonade sweat on a humid afternoon is silently working inside your AC unit every single day. Understanding that distinction — between healthy condensation and a real plumbing problem — can save you hundreds in unnecessary repair calls.
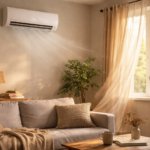
Here’s the thing: your air conditioner doesn’t just cool air. It also pulls moisture out of it. That’s why rooms feel less sticky after running the AC for a while, and it’s the reason water appears. The moisture has to go somewhere. When it’s going to the right place — the drain pan, the drain line, outside — everything is fine. When it’s dripping down your wall, pooling on your floor, or icing up your indoor unit, something has gone wrong. This article walks you through the full picture, from the basic science to the most common causes of excessive AC dripping and exactly how to fix each one.
The Science Behind Why Air Conditioners Produce Water

To really understand why your air conditioner drips, you need to spend about two minutes thinking about how humid air actually behaves. Air is never just air. At any given moment, it’s carrying invisible water vapor, and the amount it can carry depends entirely on temperature. Warm air holds more moisture. Cold air holds less. This relationship is what engineers and HVAC technicians call the dew point — the temperature at which air becomes so cool that it can no longer hold all its water vapor and starts releasing it as liquid droplets.
Your air conditioner’s evaporator coil gets extremely cold during operation — often somewhere between 32°F and 55°F (0°C to 13°C). When warm, humid indoor air flows across that frigid coil, the air temperature plummets. It drops below the dew point almost instantly, and the moisture in that air condenses out onto the coil’s surface. It’s the same principle that causes fog to appear on a bathroom mirror when you take a hot shower, or why dew forms on grass blades overnight when temperatures fall.
Those tiny water droplets cling to the coil fins, accumulate, and eventually drip down into what’s called the condensate drain pan — a shallow tray positioned directly beneath the evaporator coil inside your indoor air handler. From there, the water flows through a condensate drain line, which is typically a PVC pipe that routes outside your home or connects to a household drain. A properly functioning system makes this whole process invisible. You never see the water because it exits the building efficiently.
What most people don’t appreciate is just how much water a single air conditioner can produce in a day. A typical residential unit removes anywhere from 5 to 20 gallons of moisture from indoor air per day, depending on humidity levels and how hard the system is working. In a coastal city during a steamy summer, that upper end is easily achievable. This is a significant volume of water moving through your system constantly, which is why even a minor drain obstruction can quickly become a noticeable dripping problem inside your home.
Understanding this science also explains why your AC unit works harder — and produces more condensate — on especially humid days. The more moisture the air is carrying, the more condensation forms on the coil. High-humidity environments put your condensate management system through its paces every single day.
The Most Common Reasons Your AC Is Dripping More Than Usual

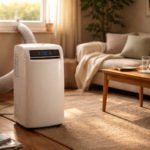
When people notice water dripping from their air conditioner in unexpected places — not from the outdoor unit into the landscaping, but from the indoor unit down the wall or from the ceiling — there’s almost always one of several well-known culprits at fault. The good news is that most of these problems are fixable without replacing equipment.
A clogged condensate drain line is by far the most frequent cause of excessive indoor dripping. Over time, algae, mold, dust, and debris accumulate inside the drain line. Eventually this buildup creates a blockage. The water that would normally flow freely out of the system backs up into the drain pan instead. Once the pan fills beyond its capacity, it overflows — and that’s when you start seeing water dripping down your walls or forming puddles on the floor near your air handler. The fix is usually straightforward: flushing the line with a wet/dry vacuum from the exterior access point, or using a diluted bleach solution to kill the algae growth. Many HVAC technicians recommend doing this preventively once a year.
A cracked or rusted drain pan is another frequent culprit, particularly in older systems. The drain pan is typically made from plastic or sheet metal, and after years of constant exposure to moisture it can develop cracks, holes, or significant rust. Even a hairline crack is enough for water to bypass the drain entirely and drip directly onto whatever surface is below the air handler. You can inspect the pan yourself with a flashlight when the unit is running — visible pooling or staining around the pan’s edges is a giveaway. Replacement pans are widely available and often a DIY fix, though some units require professional access.
Low refrigerant is a more serious issue that causes dripping through a different mechanism. When refrigerant levels drop — typically due to a leak somewhere in the system — the evaporator coil doesn’t get cold enough to properly regulate condensation. Paradoxically, it can actually get too cold, causing the coil to freeze solid. When the unit cycles off and that ice melts, it releases a large volume of water all at once — far more than the drain pan was designed to handle quickly. If you’re seeing excessive dripping accompanied by reduced cooling performance and possibly ice on your indoor unit, low refrigerant is high on the suspect list.
Dirty air filters contribute to dripping in a way that surprises many homeowners. A clogged air filter restricts airflow over the evaporator coil. With insufficient warm air flowing across it, the coil gets colder than it should — sometimes cold enough to freeze. The ice-melt-overflow cycle described above applies here too. Changing your filter every 30 to 90 days depending on usage isn’t just about air quality; it directly affects whether your condensate system can handle the water load your unit produces.
Improper installation can also lead to persistent dripping problems. If the indoor air handler isn’t level — even slightly tilted in the wrong direction — the condensate pan won’t drain properly toward the drain line outlet. The water will pool toward the low side and eventually spill over the pan’s edge. This is especially common in units installed in attic spaces or closets where leveling isn’t as carefully checked. A spirit level and a small shimming adjustment can solve what appears to be a mysterious ongoing leak.
Why the Outdoor Unit Drips Water (And Why That’s Usually Fine)

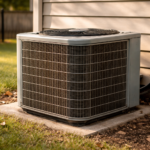
The outdoor condenser unit of a central air conditioning system behaves differently from the indoor evaporator, and the water you might see near it is almost always harmless. During normal operation, some condensation can form on the refrigerant lines and equipment surfaces on the exterior. More noticeably, you’ll often see water pooling directly under the outdoor unit during operation — this is normal condensate that has routed through the system and exited outside, exactly as designed.
On extremely humid days or during defrost cycles, the outdoor unit may appear to be leaking rather generously. In heat pump systems especially, the outdoor unit periodically runs a defrost cycle during cooler months to melt frost accumulation off the coils. This releases a significant amount of water all at once. Some homeowners see this for the first time in early spring and assume something has broken. Nothing has. It’s the system doing maintenance on itself.
There are scenarios where outdoor unit water deserves attention. If you see continuous, heavy water discharge that doesn’t correspond to operating conditions, or if water is pooling in a way that could damage the unit’s foundation or flood nearby areas, it’s worth having a technician check the refrigerant charge and ensure the drainage pathways are clear. Refrigerant leaks can manifest as frost or ice on the outdoor unit, which then melts and creates the appearance of excessive water. The difference: normal condensate is clear water appearing in moderate amounts; a problem typically presents as dramatic icing followed by large-volume melt water.
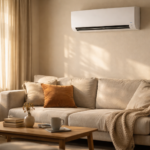
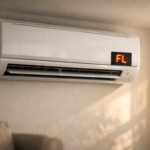
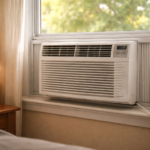
Mini-split and ductless systems behave slightly differently. The indoor wall-mounted head unit has its own condensate drain line — a small hose that routes outside. Blockages in this line cause water to drip directly from the front or bottom of the unit onto the floor or furniture below, which is often the first sign something is wrong. Because mini-split drain lines are smaller than standard HVAC drain lines, they block more easily and require more frequent attention.
When AC Dripping Becomes a Serious Problem You Can’t Ignore

There’s a version of AC dripping that’s a minor inconvenience and a version that’s a genuine emergency, and knowing the difference matters. Water damage inside your home is no small thing — drywall, insulation, flooring, and structural wood components can all be seriously compromised by prolonged moisture exposure. Mold can establish itself in as little as 24 to 48 hours under the right conditions. When an AC condensate problem goes unaddressed, it can quickly become a far more expensive issue than the repair itself.
Signs that your AC dripping has crossed into serious-problem territory include water stains on ceilings or walls near the air handler, visible mold growth on or near the unit, a persistent musty odor coming from vents, and any situation where the drain pan has overflowed onto a structural surface rather than a hard floor that can be easily dried. If your air handler is in the attic — as is common in many Southern U.S. homes — a drain pan overflow can damage the ceiling below and even compromise attic insulation. Many HVAC technicians recommend installing a secondary drain pan with a float switch in attic applications; the float switch cuts power to the unit if the secondary pan starts filling, preventing an overflow before it happens.
Water near electrical components is an obvious hazard that deserves immediate attention. Air handlers contain electrical wiring, capacitors, and control boards. Water intrusion in these areas doesn’t just mean a repair call — it can create shock hazards and fire risks. If you see water dripping in the vicinity of your unit’s electrical components or notice tripped breakers coinciding with water issues, turn the unit off and call a professional rather than trying to troubleshoot yourself.
The frequency and volume of dripping also matters. A few small drips visible on the exterior condensate line exit point on a humid afternoon is entirely normal. A constant heavy drip from the indoor unit, water pooling on the floor under the air handler, or a drain pan that you’re emptying manually multiple times a week — these indicate a system that needs attention. The underlying cause isn’t going to resolve itself with time.
How to Fix a Dripping Air Conditioner Yourself (And When to Call a Pro)
Several of the most common dripping problems are genuinely DIY-friendly, and tackling them yourself can save you the cost of a service call. The most valuable thing you can do before calling anyone is to change the air filter and check whether the drain pan is overflowing — these two steps alone resolve a significant percentage of dripping complaints.
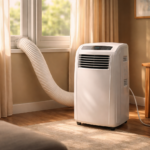
Clearing a clogged condensate drain line is a task most homeowners can handle with a wet/dry shop vacuum and about 20 minutes. Locate the exterior drain line exit point — typically a small PVC pipe near the outdoor unit or exiting through an exterior wall. Attach the shop vac hose to the end of this pipe, seal the connection with a rag or your hand, and run the vacuum for two to three minutes. You’ll often pull out a surprising amount of dark sludge and debris. Following up with a cup of diluted bleach (about one part bleach to 16 parts water) poured into the drain pan’s clean-out port — usually a T-shaped fitting with a removable cap somewhere along the drain line — helps prevent algae from regrowing.
Inspecting and replacing the drain pan is another accessible DIY task. With the unit off, use a flashlight to examine the pan closely. Look for visible cracks, holes, rust through-spots, and standing water that suggests it’s not draining properly. If the pan is cracked, temporary waterproof sealant can buy you time, but a full replacement is the correct fix. Make sure to note your unit’s model number before ordering a replacement pan so you get the right fit.
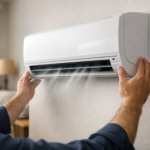
Checking that your indoor air handler is level requires only a simple level tool. Place it on the air handler casing and check in multiple directions. If the unit is significantly off-level, you may be able to add small shims to the mounting frame to correct it — but in units mounted in tight closets or attic spaces, this can require professional repositioning.
The situations that genuinely require a professional include refrigerant-related problems (adding refrigerant is legally restricted to certified technicians and requires specialized equipment), electrical concerns, units with persistent icing that don’t resolve after filter replacement, and any situation involving water damage to the building structure or signs of mold. Refrigerant leak diagnosis, in particular, requires a systematic pressure test and leak detection process that DIY tools simply can’t replicate reliably.
Preventing AC Dripping Problems Before They Start
The most effective approach to AC condensation problems is preventing them rather than reacting to them. A well-maintained system that rarely drips internally is not a lucky accident — it’s the result of a few consistent habits and an annual professional check that catches issues before they escalate.
Replacing your air filter on schedule is the single highest-impact habit you can develop as an AC owner. The exact replacement interval depends on your filter type, the number of people in your home, whether you have pets, and your local air quality — but a general guideline is every 30 days for basic fiberglass filters, 60 to 90 days for standard pleated filters, and every six months for higher-end MERV-rated filters in clean environments. When in doubt, check it monthly. A filter that looks dark gray and packed with debris needs to go regardless of when you last changed it.
Preventive drain line maintenance takes about five minutes and should happen at the start of every cooling season. Pouring a cup of distilled white vinegar (or diluted bleach) into the drain pan’s access port kills algae and prevents the slow buildup that causes blockages. Some homeowners do this monthly during peak summer usage, which is a worthwhile habit in humid climates. There are also condensate drain tablets available at hardware stores that dissolve slowly in the pan and provide ongoing algae prevention without repeated manual treatment.
Annual professional HVAC maintenance is where more serious issues get caught early. A trained technician will check refrigerant pressure, inspect coil cleanliness (dirty evaporator coils cause temperature and condensation problems similar to low refrigerant), verify proper drainage, and inspect electrical components. A system that hasn’t been serviced in several years is running on borrowed time before one of these components causes a dripping problem — or something more serious.
Ensuring proper attic ventilation and home humidity control also reduces the condensate load on your system. If your home’s humidity is consistently above 60%, your AC is working overtime to remove moisture from the air — producing more condensate than it would in a well-sealed, properly ventilated home. A whole-home dehumidifier or even strategically placed portable dehumidifiers in chronically humid spaces can noticeably reduce how hard your AC has to work, extending equipment life and reducing condensate volume simultaneously.
Final Thoughts: What to Do When Your AC Drips
Water and air conditioners are inseparable — the moisture removal is part of the job. A little dripping from the right places is completely normal and actually signals a healthy, working system. The problem is when that water ends up somewhere it shouldn’t: pooling under your indoor unit, staining your ceiling, or dripping from your wall-mounted head unit onto your furniture.
Start with the simple checks: change the filter, look at the drain pan, flush the condensate line. These three steps solve the majority of residential dripping complaints. If the problem persists after that — especially if you notice ice, poor cooling, or water near electrical components — it’s time to call a certified HVAC technician. Don’t wait. Water damage compounds fast, and what starts as a drain line flush can become a drywall repair if ignored long enough.
Keep your system on an annual maintenance schedule and make filter changes a habit. Your air conditioner will reward you with reliable, efficient performance — and dry floors.