Have you ever thrown a load into your dryer only to find it either under-dried or overcooked? If so, your dryer sensor might be the culprit! Dryer sensors, also called moisture or temperature sensors, are silent heroes that ensure your clothes come out perfectly dry every time. When they malfunction, it can feel like your appliance has turned against you.
I’ve been there myself—watching a favorite sweater shrink while the dryer kept humming. But don’t worry! In this guide, I’ll walk you through why your dryer sensor is not working, common causes, and actionable fixes you can try at home. We’ll also explore maintenance tips, replacement options, and practical advice to get your dryer back to its reliable self. By the end, you’ll understand both the “why” and the “how” behind sensor issues, saving you time, frustration, and potentially costly repairs.
How Dryer Sensors Work
Understanding why a dryer sensor might fail starts with knowing how it works. Most modern dryers use moisture sensors that detect water levels in clothing to adjust drying time automatically. Some models also have temperature sensors that prevent overheating.
These sensors usually consist of metal strips inside the drum that register moisture when wet clothing touches them. If the sensor detects dampness, the dryer continues running; when it senses dryness, it stops. This is why a faulty sensor can make clothes feel either too damp or scorchingly hot.
From personal experience, I’ve seen dryers stop mid-cycle with a load of towels. A quick inspection revealed mineral buildup on the sensor strips—something as small as detergent residue can throw the entire system off. It’s a small component, but its role is enormous.
Finally, different dryer brands have slight variations. For example, some Samsung and LG models use advanced electronic sensors, while Whirlpool and GE often rely on more basic metal strips. Knowing your dryer type helps identify the right troubleshooting steps.
Common Causes for Dryer Sensor Failure

When your dryer sensor is not working, there’s usually a reason behind it. Dirt and lint buildup is the most common culprit. Over time, residue from fabric softeners, dryer sheets, or hard water minerals can coat the sensor strips, making them unresponsive.
Another common cause is electrical issues. A loose connection, frayed wiring, or a damaged control board can prevent the sensor from sending accurate readings. I once replaced a sensor ribbon cable in a friend’s dryer, and it solved a months-long drying inconsistency in under 10 minutes.
Physical damage or corrosion is also a frequent problem. Sensors in high-humidity environments or older dryers may corrode over time. Even if your dryer looks clean on the outside, the sensor inside could be silently failing.
Finally, software glitches in smart dryers can confuse sensors. If your dryer runs with outdated firmware, it may misread moisture levels. Updating the system or performing a factory reset often resolves these subtle issues.
Diagnosing a Faulty Dryer Sensor
Before replacing anything, you need to confirm whether the sensor is truly faulty. Start by running a cycle with wet clothing and observing if the dryer stops too early or continues excessively. If it does, the sensor might be the issue.
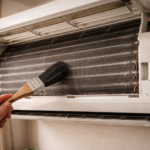
Next, visually inspect the sensor strips for residue or discoloration. A mild cloth with rubbing alcohol can clean mineral deposits effectively. I recommend avoiding abrasive tools that could scratch the metal.
For more advanced users, a multimeter can test the electrical continuity of the sensor. If readings are off, it confirms a failure. I recall using this method on a Samsung dryer—the sensor showed no continuity at all, and a replacement restored proper drying.
Finally, check for error codes on your dryer’s display. Many models provide fault codes specifically for sensor failures, saving you guesswork and unnecessary replacements.
DIY Fixes for Dryer Sensors

Many sensor issues can be resolved at home without calling a technician. Cleaning the sensor strips is the simplest first step. A soft cloth dipped in white vinegar or rubbing alcohol removes residue without damaging the metal.
Tightening loose wires is another straightforward fix. If you notice any frayed or disconnected wires leading to the sensor, reconnecting them can restore functionality immediately. I’ve personally done this on a GE dryer, and it worked like magic.
Resetting your dryer can also help. Power it off, unplug for a few minutes, and restart the cycle. Sometimes, sensors simply need a system refresh to recalibrate.
For those with older dryers, replacing the sensor entirely may be the best option. OEM replacement parts are available for most brands, and the process is generally simple: remove a few screws, swap the sensor, and test. Always consult your user manual for model-specific instructions.
Preventing Future Sensor Problems
Prevention is better than repair. Regularly cleaning your dryer drum and sensor strips prevents residue buildup. Avoid using excessive fabric softener or dryer sheets that leave heavy coatings.
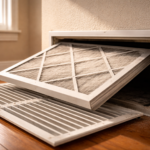
Monitoring dryer vent cleanliness also helps. A clogged vent increases moisture and heat inside the drum, which can prematurely wear out sensors. I recommend a quarterly inspection—especially if you do heavy loads like towels or bedding.
Keeping your dryer firmware updated and performing periodic resets ensures smart sensors remain accurate. Small actions like these can extend the life of your dryer sensor for years.
When to Call a Professional
Not all sensor issues are DIY-friendly. If cleaning, tightening, or replacing the sensor doesn’t solve the problem, professional help is wise. Electrical failures or control board issues require expert diagnostics.
Attempting complex repairs without knowledge can worsen the problem or void warranties. I once tried bypassing a sensor on a high-end LG model—turns out it was a control board issue, and the quick DIY approach would have caused more damage.
A certified appliance technician can test, repair, or replace sensors accurately. They can also inspect related components like wiring, venting, and the heating system to ensure your dryer works safely and efficiently.
Conclusion
A dryer sensor not working can disrupt your laundry routine, but most problems are fixable with the right knowledge. Cleaning the sensor, checking wiring, and understanding your dryer model are the first steps. For stubborn issues, replacing the sensor or consulting a professional ensures long-term reliability.
By addressing the problem promptly and taking preventive measures, you can keep your dryer efficient, protect your clothing, and avoid costly repairs. Next time your dryer misbehaves, you’ll know exactly where to look and what to do—confidence and clean laundry in one go!