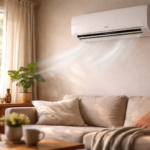
Ever had your AC hum but refuse to start? Or worse—just stop cooling in the middle of a hot day? You’re not alone, and in many cases, the culprit is something small: the capacitor.
A failing HVAC capacitor is one of those hidden problems that can quietly disrupt your entire cooling system. I’ve seen systems act completely “dead” when the issue was just a weak capacitor.
In this guide, I’ll walk you through exactly how to test a HVAC capacitor, what the readings mean, and how to avoid common mistakes that can cost you time or money. Let’s break it down in a simple, real-world way.
What a HVAC Capacitor Actually Does

A HVAC capacitor is basically the “kickstarter” for your system. It stores and releases electrical energy to help motors start and keep running smoothly. Without it, your compressor or fan motor may struggle or fail to operate altogether.
In most residential systems, you’ll find two types: a start capacitor and a run capacitor. The start capacitor gives that initial boost of energy to get the motor going, while the run capacitor keeps things stable and efficient during operation.
I’ve personally seen cases where a system wouldn’t turn on at all, and homeowners assumed the worst—compressor failure. But after testing, it turned out to be a $15 capacitor. That’s a huge difference in cost and stress.
Here’s a practical tip: if your system hums but doesn’t start, don’t panic. That’s often one of the earliest signs of capacitor trouble.
The subtle insight most people miss is that capacitors don’t usually fail instantly. They degrade over time, which means your system slowly becomes less efficient before it completely stops working.
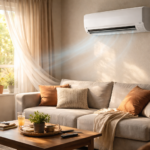
Signs Your HVAC Capacitor Might Be Failing
Before you even test anything, your system often gives you clues. These early warning signs are easy to miss if you’re not paying attention.
One of the most common symptoms is a humming sound from the outdoor unit without the fan spinning. Another is the system taking longer than usual to cool your home, especially during peak heat.
I once worked with a homeowner whose system was running, but the cooling was inconsistent. Sometimes it worked fine, sometimes it didn’t. That turned out to be a weakening capacitor that was failing under load.
A practical tip here is simple: if your AC behaves unpredictably, don’t ignore it. Intermittent issues are often the first stage of capacitor failure.
What most people don’t realize is that a bad capacitor can also increase your electricity bill. The system works harder, draws more current, and becomes less efficient over time.
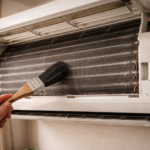
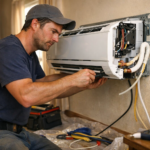
Tools and Safety Before Testing
Before you even think about testing, safety comes first. A capacitor can hold an electrical charge even after the power is off, and that charge can give you a serious shock if you’re not careful.
You’ll need a multimeter that can measure capacitance, a flathead screwdriver for discharging, and basic protective gear like insulated gloves.
In one real situation, a DIY user skipped the discharge step and got shocked while removing the capacitor. It wasn’t fatal, but it definitely wasn’t worth the risk.
A practical tip: always shut off power at the breaker and double-check using a voltage tester before touching anything inside the unit.
A subtle but important insight—many cheap multimeters don’t measure capacitance accurately. If you’re serious about diagnosing HVAC issues, invest in a reliable one. It makes a big difference in accuracy.
Step-by-Step: How to Test a HVAC Capacitor

Testing a capacitor isn’t complicated, but it does require attention to detail. First, make sure the power is completely off and the capacitor is safely discharged.
Next, remove the capacitor from the system and inspect it visually. Look for bulging, leaks, or burn marks. If you see physical damage, you can skip testing and replace it immediately.
Then set your multimeter to the capacitance setting (µF). Connect the probes to the capacitor terminals and wait for the reading to stabilize.
Now comes the important part—compare the reading to the value printed on the capacitor. For example, a 45 µF capacitor typically has a tolerance of about ±6%. If your reading is far outside that range, the capacitor is faulty.
I’ve seen cases where a capacitor read 35 µF instead of 45 µF. It still “worked,” but the system struggled and eventually failed.
A practical tip: even if the reading is slightly off but still within range, consider replacing the capacitor if it’s old. Preventive replacement can save you from unexpected breakdowns.
The insight most people miss is that weak capacitors don’t always fail immediately—they gradually degrade performance, which can affect your compressor and fan motor over time.
Common Mistakes When Testing a Capacitor
One of the biggest mistakes is skipping the discharge step. This is not optional—it’s essential for your safety. Capacitors store energy, and that energy doesn’t disappear just because the power is off.
Another common mistake is using the wrong multimeter setting. If you’re not measuring capacitance properly, your readings won’t be accurate, and you might replace a perfectly good capacitor.
I’ve also seen people try to test capacitors while they’re still connected to the system. This can give misleading readings and isn’t a reliable method.
A practical tip: always remove the capacitor before testing. It’s a small step that improves accuracy significantly.
What most people don’t know is that temperature can affect capacitor readings. Testing in extreme heat or cold can slightly skew results, which is why stable indoor conditions are ideal for accurate testing.
When to Test vs When to Replace
Not every situation requires testing. Sometimes, replacement is the smarter move.
If your capacitor is visibly damaged—bulging, leaking, or burnt—there’s no need to test it. Replace it immediately.
Testing makes more sense when the capacitor looks fine but your system is showing symptoms like weak airflow or startup issues.
I’ve worked on systems where the capacitor passed testing but was still replaced because it was borderline and already aging. That proactive decision prevented a future breakdown during peak summer.
A practical tip: if your capacitor is more than 5–7 years old, consider replacing it even if it still tests “okay.”
The insight here is simple—capacitors are inexpensive, but the damage they can cause if they fail is not. Replacing early is often the smarter long-term decision.
Final Thoughts: Testing HVAC Capacitors the Right Way
Testing a HVAC capacitor is one of the simplest ways to diagnose AC issues, but it’s also one of the most misunderstood. Once you know what to look for, the process becomes straightforward and even empowering.
Start with safety, check for visible damage, and use a reliable multimeter to get accurate readings. If something feels off or borderline, don’t hesitate to replace the capacitor—it’s a small investment compared to potential system damage.
If your HVAC system is acting up, this is often one of the first things to check. A little attention now can save you from expensive repairs later.
Stay proactive, keep an eye on performance changes, and don’t ignore early warning signs. That’s how you keep your system running efficiently—and avoid those frustrating breakdowns when you need cooling the most.